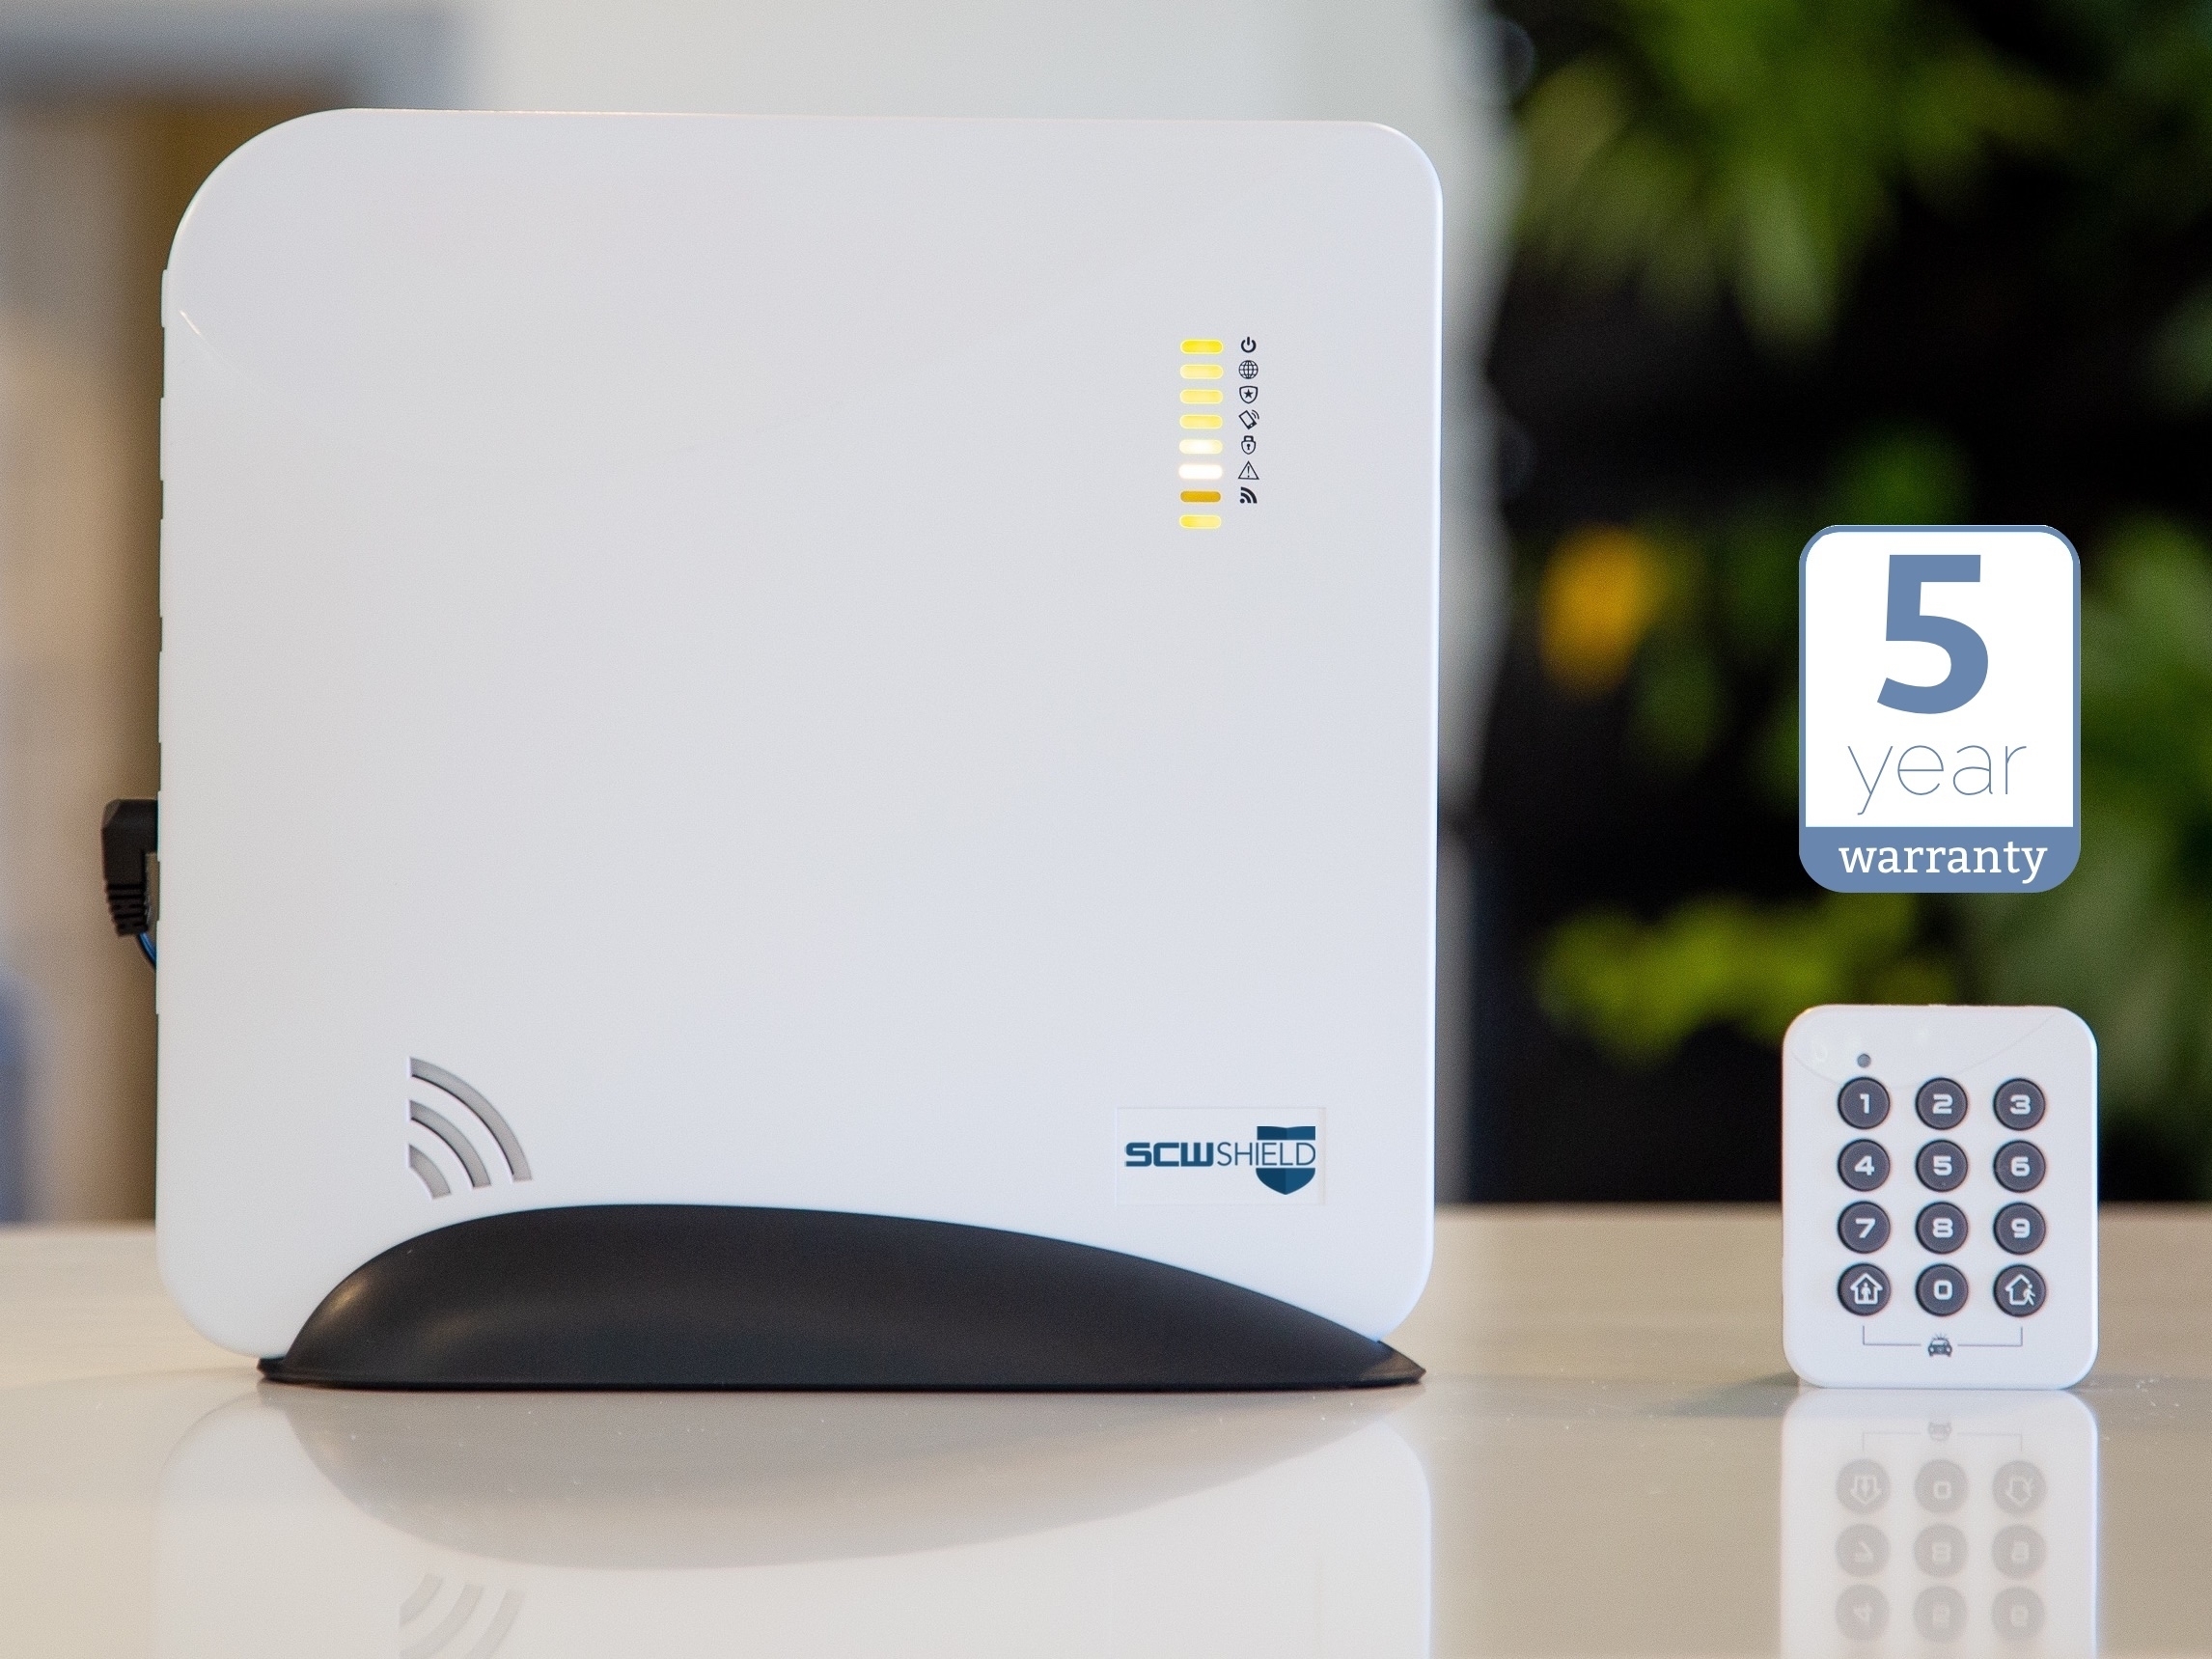
SCW Shield Alarm Hub and Pin Pad Bundles
Usually ships the same business day if ordered before 2PM EST.
Easy to Install
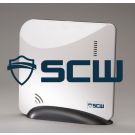
Hides in plain sight
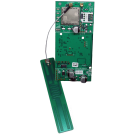
Comes with battery backup
No phone line needed - uses the internet connection you already have
Arm/Disarm with SCW Shield App, Keypad, or Key Fob
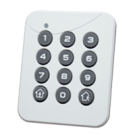
Includes one Pin Pad
Works with SCW Intrusion Sensors
1500 foot sensor range


System Configuration(s):
-
Self Monitoring (Month-to-Month, No Commitment)
1xApp Monitoring - Get alerts on the go, with the Shield app 1xPin Pad for SCW Shield - 74PIN 1xSCW Shield Alarm Hub- 74HUBAs configured: $260.00
-
Professional, Smart Monitoring and Home Automation Controls (Month-to-Month, No Commitment)
1xPin Pad for SCW Shield - 74PIN 1xVerizon LTE Card for SCW Shield Alarm Hub - 74LTE 1xZ-Wave Home Automation Control Card for SCW Shield Alarm Hub - 74ZWC 1xSmart, Professional Monitoring + App Monitoring - Get alerts on the go, with the Shield app & Peace of Mind with 24/7 Professional Monitoring 1xSCW Shield Alarm Hub- 74HUBAs configured: $559.99


No Problem
Whether you plan to DIY install or want us to do it for you, we're as flexible as you need.
Get a Custom Quote for Equipment or Installation
Features
Easy to Install
Hides in plain sight
Doesn't look like an alarm
Comes standard with battery backup.
Package Comes with one Pin Pad
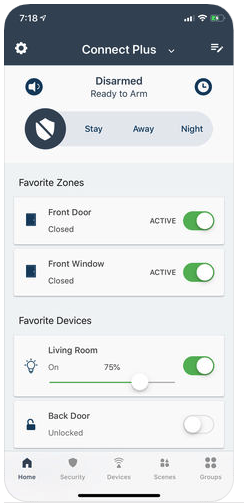
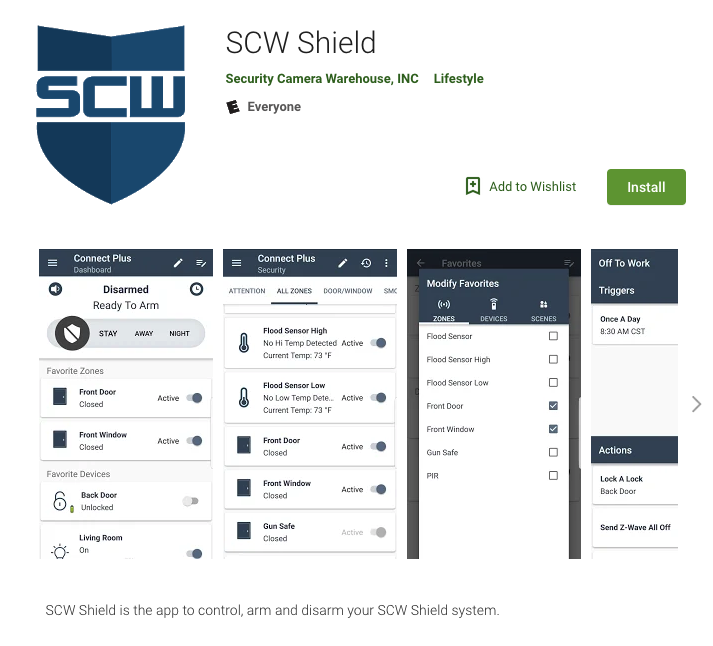
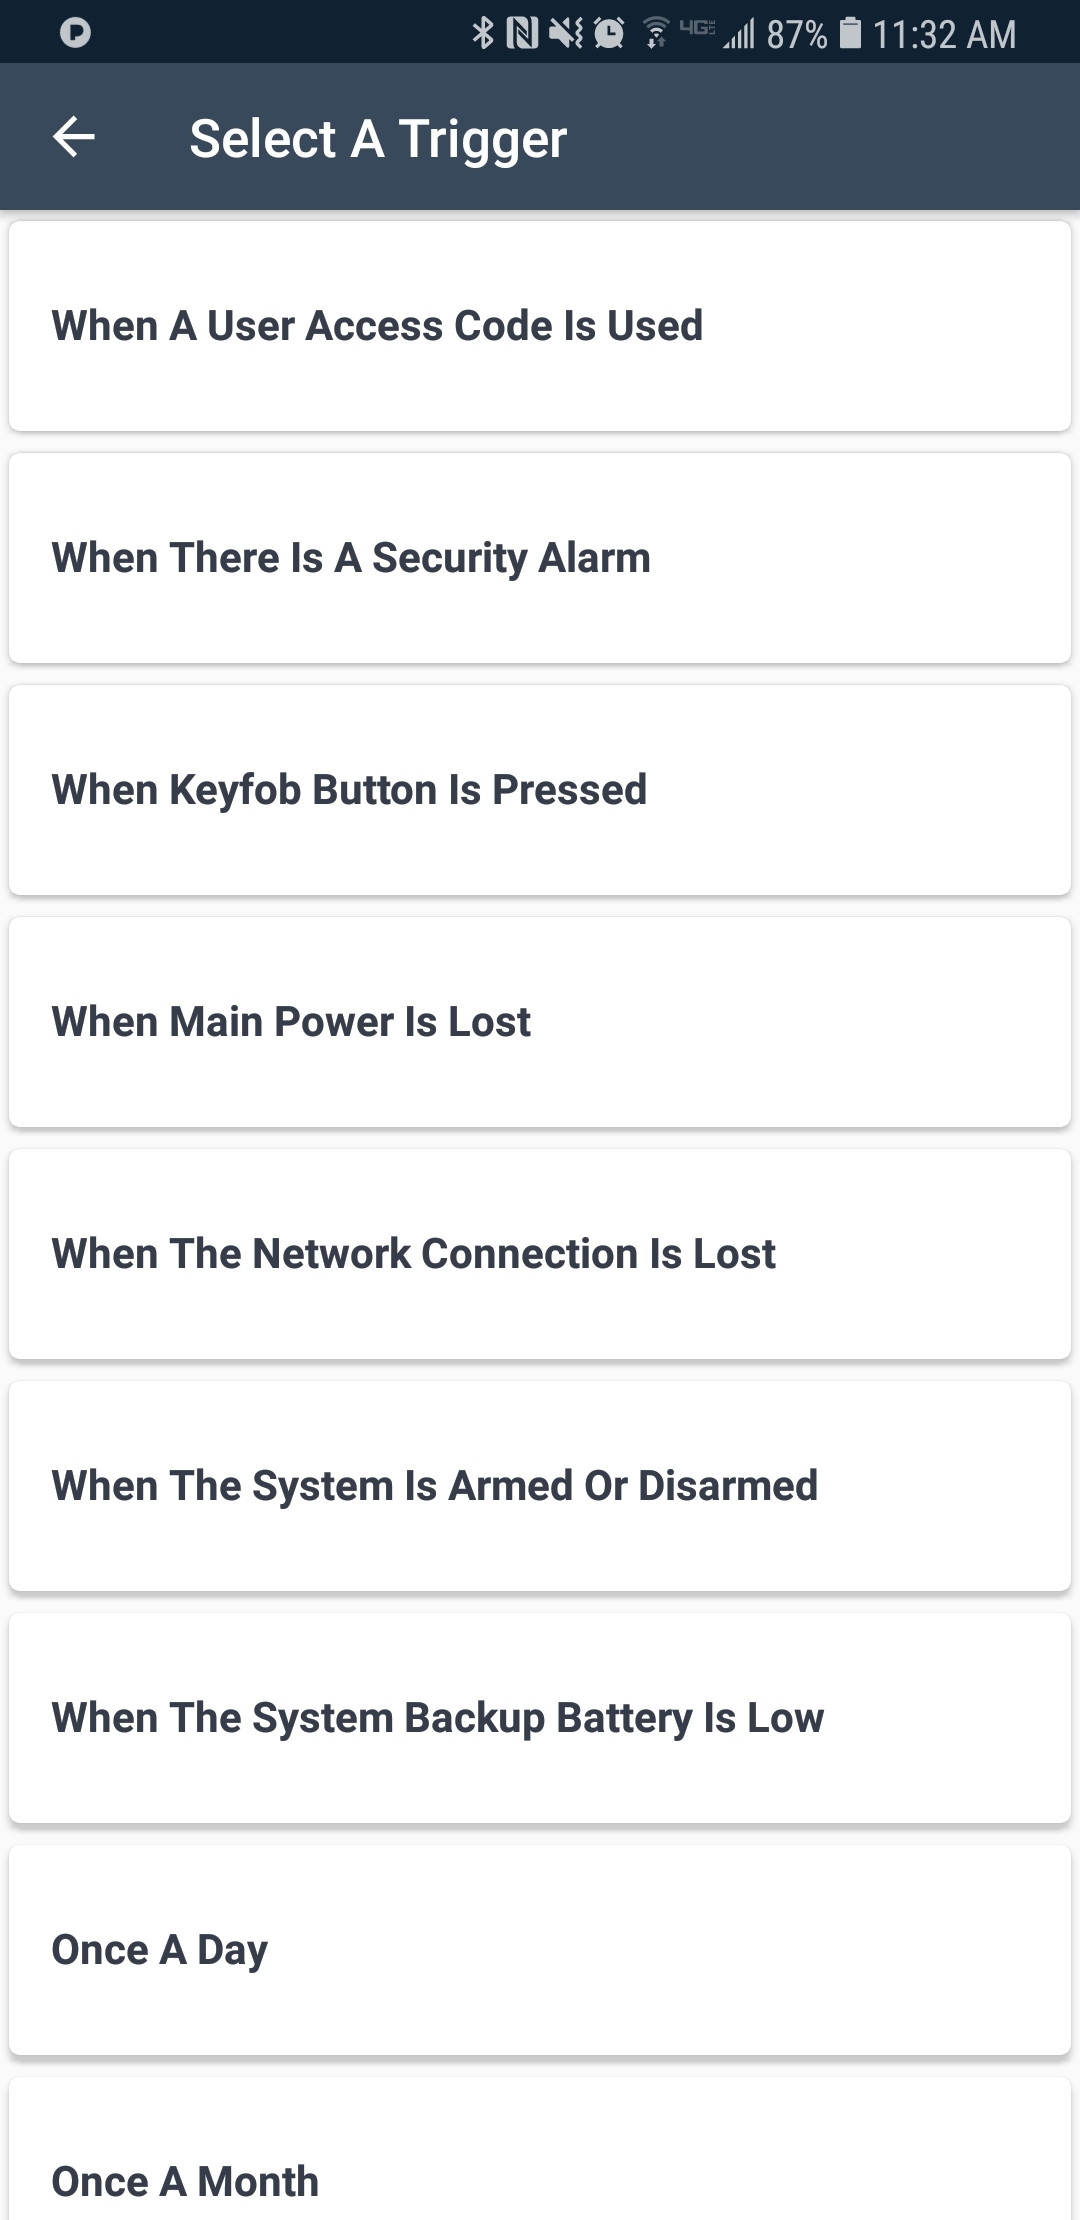
Arm/Disarming Options
SCW Shield App
Keypad
Keyfob
Add-ons
Verizon Cellular Backup Card Available
Z-Wave Integration Card Available

Easy to Install
Plug it in to your router, plug it in to a wall socket, and download our app - and you're done.
How is it so easy?
We pair the sensors before we even ship the hub to you, so there's almost nothing you need to do.
After you get the items in, you have SCW's award winning amazing technical support at your service.
Hidden in Plain Sight
Catch 'em by surprise.
Thieves won't know what to disable, because the pin pad goes by the door, not the alarm.
One Pin Pad comes with each Hub.


Complete Controls
Arm or Disarm with our App, Pin Pad, or Keyfob
Use the app to see what doors are open, see the temperature, change your thermostat's settings, lock your door, turn off your electronics, or many other things.*
*Assuming you have those sensors or z-wave products.
No Power, No Internet, No Problem
Comes standard with battery backup.
Doesn't need a landline since it uses the internet connection you already have.
Cellular backup add-on available for Shield Basic. Verizon wireless cellular backup come standard on Shield Elite.

American-Based Technical Support after the sale. For FREE. Forever.
Real review from Larry, who had this to say:
The most important part of a purchase like this is the support for technical assistance when there is a question or when there is a problem, and they always exceed expectations!
All of our equipment comes with Free Technical Support that is US based (Our Warehouse and Staff are located in Asheville, NC). We're happy to help you via chat, email, screen share / remote support sessions, and phones. Our number is 866-414-2553 and we're open from 9-7 M-F (EST).

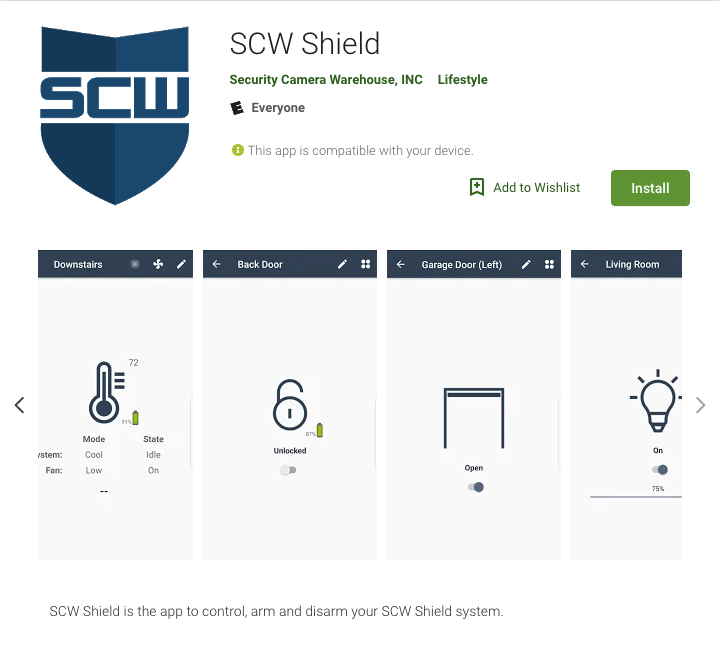
Add the optional Z-Wave home automation card and get...
Complete Control
Go ahead create that perfect environment.
Have your foyer light come on when you open your door
Make your AC automatically turn off when you open a window
Automatically turn off your water valve when we detect a water leak.
There's thousands of automations you can create when you choose our SCW Elite Hub since it supports thousands of independent Z-Wave products already!

Items Included in the Box
The SCW Shield Alarm panel
Rechargeable backup battery
12-Volt power adapter
6-foot Ethernet cable
Table-top mounting base
A screw to secure the cover (required for UL installations)
A pin pad
Shield Hub can support:
8 Bluetooth Smart devices (including BLE connected phones)
8 Pin Pads
8 Wireless Sirens
50 Fobs (one for each user on the system)
The SCW Shield Alarm Hub Specs
Physical Specifications |
|
|
Housing Body Dimensions
|
8.9 x 8.9 x 1.5 inches (22.6 x 22.6 x 3.8 cm)
|
|
Housing Base Dimensions
|
8.2 x 1.3 x 2.7 inches (20.8 x 3.3 x 6.7 cm)
|
|
Weight with Battery
|
26.8 ounces (760 grams)
|
|
Mounting Fastener
|
#6 or #8 screws (not provided)
|
Environmental Specifications |
|
|
Operating Temperature
|
32 to 120 °F (0 to 49 °C)
|
|
Storage Temperature
|
-4 to 86 °F (-20 to 30 °C)
|
|
Maximum Humidity
|
85% non-condensing relative humidity
|
Panel Specifications |
|
|
Frequency
|
433.92MHz for the sensors (encrypted), 2.4GHz
|
|
Power Supply, Input
|
100-240VAC, 50/60 Hz, 0.5Az
|
|
Power Supply, Output
|
12VDC, 1A
|
|
Battery
|
24 hours maximum (4 hours minimum for RE6130); 6VDC, 2.5Ah, NiMH
|
|
Battery Charging Draw
|
25mA (Trickle), 95mA (Fast)
|
|
Current Draw
|
150mA (Normal), 300mA (Alarm)
|
|
Current Draw (Battery Charging)
|
250mA (Normal), 400mA (Alarm)
|
|
Tamper Indications
|
Cover opening and Wall removal
|
|
Sensors
|
Up to 96 Wireless Security Zones
|
|
Interface Devices
|
up to 8 Bluetooth Smart devices (including BLE connected phones)
up to 8 Pin Pads Up to 8 Wireless Sirens Up to 50 Fobs (one for each user on the system) |
|
Max Users
|
50
|
Certifications |
|
|
Certifications
|
UL1023, UL985, UL1635, UL1610, ORD-C1023-1974, ULC S304
ULC-S545-M89, ETL, FCC, IC
EN 60950-1, EN 300 220, EN 301 489, RCM
EN50131-3, EN 60950-1, EN 300 220, EN 301 489, CE
UL1023, UL1635, ORD-C1023-1974, ETL, FCC, IC
|

Installation Instructions:
1. Find a location for the panel, keeping in mind it needs AC power and a network connection.
Ideal Panel Location Guidelines
• Locate centrally on the main floor.
• Avoid mounting below ground level.
• Do not mount near ducts, appliances, or other large metal objects.
• Do not mount directly adjacent to other RF devices. We include a 6 ft cable, try to keep the hub 6 feet from your router or modem. Routers, modems, and other electronic devices emit RF noise. For best results, avoid mounting the panel directly beside other electronic devices.
2. Mount the panel by sliding it downward into the table-top base. Alternatively, the panel can be mounted to a wall using the mounting holes in the back cover. You will need to remove the backup battery to reveal the lower mounting hole.
3. Connect the panel to the Internet by wiring its Ethernet port to the home router
4. Power up the panel by inserting the power supply barrel into the power jack on the side. Route the power cable under the strain relief peg.
5. Install the cover-securing screw.
• Do not connect the panel to an AC power receptacle controlled by a switch.
• The power supply must be secured to an outlet if installed in the USA.
• The power supply must NOT be secured to an outlet if installed in Canada.
6. Mount all your sensors.
7. Finally, test the system using the SCW Shield App. System testing should be performed after installation is completed and whenever a problem occurs. Smoke and CO detectors should be tested after installed and weekly by pressing the test button on the detector. The panel will indicate it has properly received a test signal by sounding a temporal three sound for a Smoke detector or a temporal four sound for a CO detector. Critical functions and communication links of the system are automatically monitored and exercised to detect trouble conditions.
How to Pair Sensors
You only have to do this when ordering a separate sensor to add to a system. We will normally pair all your sensors when making your initial purchase.
Putting the SCW Shield Hub in Enrollment Mode
First, press the Enroll/WPS button on the side of the panel until it beeps once (roughly 3 seconds) and then sending an enrolment signal from the sensor or peripheral.
Enrollment Tips
Enrollment signals are typically triggered by removing the battery tab or tampering the device. See the specific device manual for more information.
Wireless enrollment mode will end 5 minutes after the last sensor is enrolled.
Enrolling a Keypad or other 2.4GHz peripheral will automatically end wireless enrollment mode
Tapping the Enroll/WPS button will end wireless enrollment mode.
Enrolling Sensors and Peripherals
Door / Window: Remove the battery tab, which can be done without removing the cover, OR Touch the magnet to the sensor 5 times within 5 seconds, OR Remove the cover to trip tamper
Flood-Freeze-Overheat-Sensor: Remove the battery tabs, OR Remove the wall clip from the sensor body
Glassbreak: Enroll by placing the panel into wireless enrollment mode and then pressing the enrollment button on the sensor
Tilt Sensor: Enroll by placing the panel into wireless enrollment mode and then removing the cover to send an enrollment signal from the sensor.
Pet-Proof Indoor Motion: Enroll by placing the panel into wireless enrollment mode, and then removing the cover to send an enrollment signal from the motion sensor.
Commercial Motion: Enroll by placing the panel into wireless enrollment mode, and then pulling the battery tab or tampering the device.
Outdoor Motion: Enroll by placing the panel into wireless enrollment mode, then remove the battery tab, OR remove the cover to trip tamper.
Panic-Button: Enroll the panic by placing the panel into wireless enrollment mode and pressing the red panic button.
Smoke Sensor: Enroll the smoke alarm by placing the panel into wireless enrollment mode and then holding down the smoke’s test button until the smoke alarm beeps.
CO Sensor: Enroll by first placing the panel into wireless enrollment mode. To send the enrollment signal, press and hold the test button for several seconds. The CO Alarm is not powered until the battery tabs are removed and it is installed on the mounting plate. If the test button is not working, check to ensure the CO Alarm is properly installed in the mounting plate. Use your hand or a cloth to muffle the sounder beeps when using the test button for enrollment. The test button must be held for a couple seconds after the CO Alarm beeps before it will send the enrollment signal.
Siren: Enroll by placing the panel into enrollment mode and then pressing the siren‘s enrollment button located inside the battery compartment. Once enrolled, arm and disarm the panel to verify the siren is within range and properly enrolled The panel only supports one siren at a time. Enrolling a second siren will remove a previously enrolled siren.
KeyFob: Enroll the Five Button Fob by placing the panel into wireless enrollment mode and pressing the away and stay arming buttons simultaneously.
PinPad: Enroll by placing the panel into wireless enrollment mode and then sending an enrollment signal from the PINPad. Press 1 and 3 buttons simultaneously.
SCW Shield Battery Statuses
The SCW Shield Alarm Hub Panel comes with a 24 hour rechargeable battery back up inside. The panel will come with the battery already connected because the panel will never power up by the battery alone.
The battery can have three different statuses. Those status can be:
OK
Low
Missing
Low – If a low battery message is present check event history for AC Failures to determine if the battery has been used recently. If a battery has been fully drained it will take up to 48 hours to completely charge the battery again. Low battery indication should clear before that time. If it has not restored within 48 hours, power cycle the panel. If still showing Low, contact support as a replacement may be required.
Missing – Missing indicates the battery is disconnected from the panel. Unplug the battery and ensure it snaps into the connector on the panel. Close the panel and ensure the trouble has cleared.
OK - battery is working correctly.